.:: Monoprice Select Mini V2 ::.
Monoprice Select Mini V2 information
LAST MODIFIED: 11-10-2021 | PAGE HITS: 4,367
Monoprice Select Mini V2 Information
PRINTER NOTES
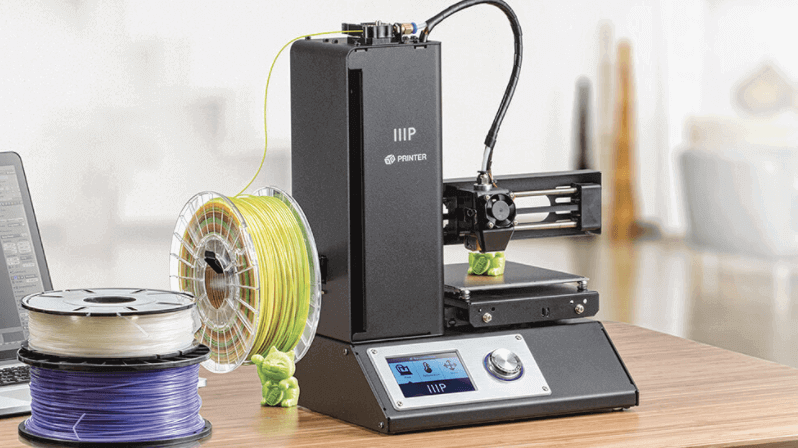
• This is a great entry level 3d printer. They are sold on Amazon for about $220
• 1.75mm filament diameter. NinjaFlex will not work.
• Build plate volume is 120mm x 120mm x 120mm
• Nozzle diameter is 0.4mm. Nozzle thread is M6.
• Works with PLA or ABS filament, however brass extruder nozzles don't last long with ABS.
• Try to avoid glow-in-the dark filament. For wood filament use larger nozzle hole size.
• I recomend using CURA as the slicer program. It is free and very powerful. Some people prefer Simplify3D however it isn't free.
• Extruder temperature should be 200 degrees C. Bed temperature should be 60 degrees C. PLA doesn't require a heatted bed but it does help. A hot build plate might warp the plate surface.
• If your printer has a fan in the back then it's the V2 model. Otherwise it is the V1.
• Be sure to eject the SD card from your PC before pulling it out. It might cause file system corruption. If you have problems with the SD card then try to delete all the files in it and then format it.
• SD card must be smaller than 4GB.
• If your printer has trouble reading the SD card, then delete all the files in it and format the SD card. Not all SD card work.
• When formating the SD card use the following settings: FAT32, 512 byte allocation unit size, and quick format option.
• Many people report that the wires for the build plate heater rub against each other and against the drive belt and fail. There are youtube videos that show how to reroute the wires.
• I do not recomend updating the firmware. The printer can become permanantly damaged.
• Some printers come with BuildTak printing surface. If yours doesn't have one then I highly recomend you get it. It is the best surface to print on. Using glue stick on top of the build plate makes it easier to remove the printed parts.
• If your extruder is too low to the build platform then the part may be very difficult to remove from the plate.
• Keep filament stored in 1 gallon plastic bags in order to keep ot dust and humidity. Silica gel is recomended too.
• When inserting filament, do not press the spring level too hard. Only enough to get the filament in.
• When removing printed part from the build plate, do not use a lot of force. It may damage the thermistor under the plate. Scraping the part off front to back instead of right to left will put less stress on the solder contacts of the thermistor.
BED LEVELING
Move your extruder hear to all 4 corners of the bed. Use a sheet of paper as a spacer between the nozzle and the bed. Loosen the screw until you can fit the sheet of paper between the bed and nozzle. Now make the screw tighter until the card can still move around but slightly touching the nozzle.
SETTING UP CURA
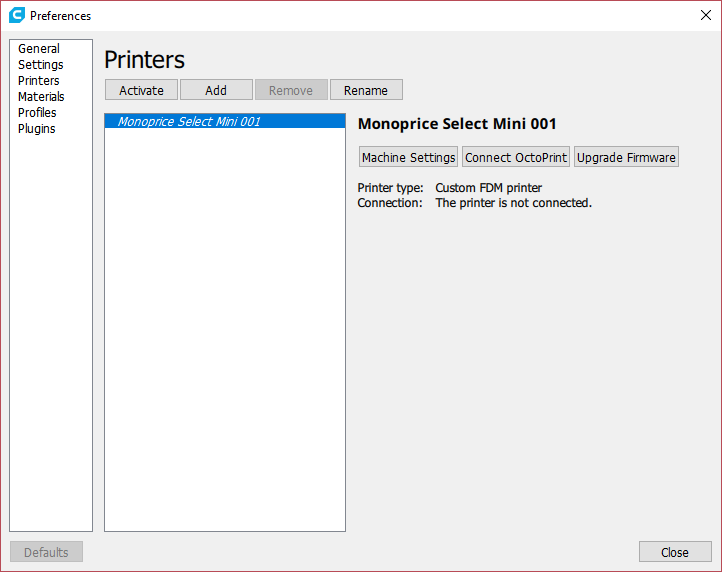
Click "Add".

Select "Custom FDM Printer" and give your printer a name. Then click "Add Printer".
Click "Machine Settings".
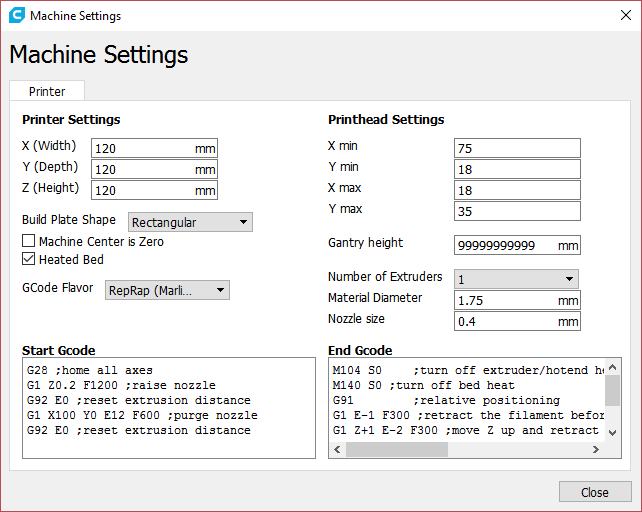
Make sure all of your settings look like this.
START G-CODE (this code is executed before the print)
G28 ;home all axes
G1 Z0.2 F1200 ;raise nozzle
G92 E0 ;reset extrusion distance
G1 X100 Y0 E12 F600 ;purge nozzle
G92 E0 ;reset extrusion distance
END G-CODE (this code is executed after the print is finished)
M104 S0 ;turn off extruder/hotend heat
M140 S0 ;turn off bed heat
G91 ;relative positioning
G1 E-1 F300 ;retract the filament before lifting the nozzle to release some of the pressure
G1 Z+1 E-2 F300 ;move Z up and retract filament 2mm
G90 ;absolute positioning
G1 X20 Y115 F1000 ;move bed forward and hotend towards the tower
M84 ;disable motors
EXAMPLE SETTINGS
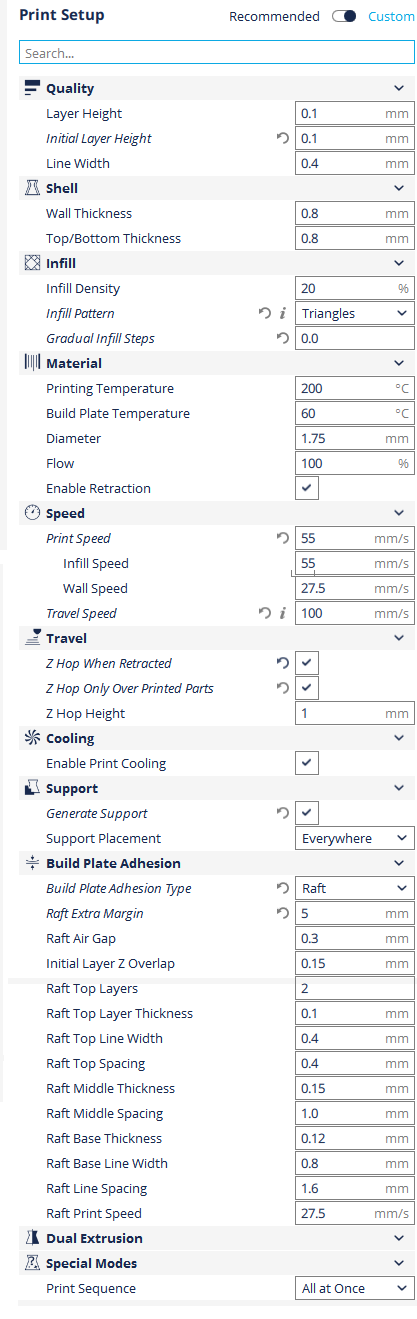
In order to see these custom settings as per this image, you need to toggle the "Recommended / Custom" switch to custom.
In order to make the hidden printer attributes visible, in the list, move your mouse over the group and click the gear icon that will appear.

This window will show up. Here you can use the search feature find attributes that you want to make visible. Click the check box to the left of the attribute to make it visible.
MAGIC LAYER HEIGHTS
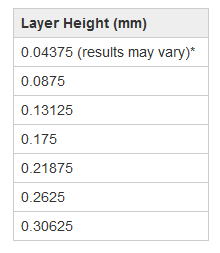
• Using these values as layer height will create smooth walls.
• I normally use 0.1mm or 0.3mm as my layer height.
• If you use 0.3mm layer with a raft, then it will be hard to remove the raft. Rafting works well with 0.1mm
• Do not use a layer height of more than 0.3mm
ESSENTIAL MODIFICATION
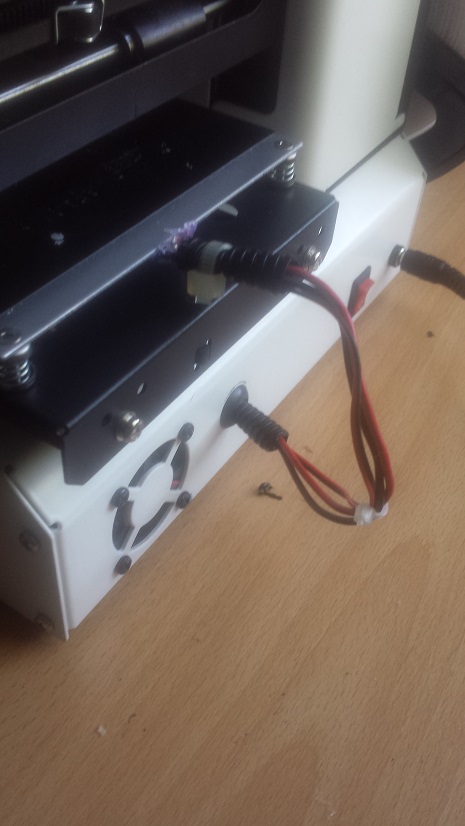
Back view of heat bed wiring reroute modification. I highly recomend performing this modification. In most of these printers the bed heater wires rub against the Y axis drive belt until it fails. This is both bad for the bed wires and the belt. Many bed heat sensors fail because of this.
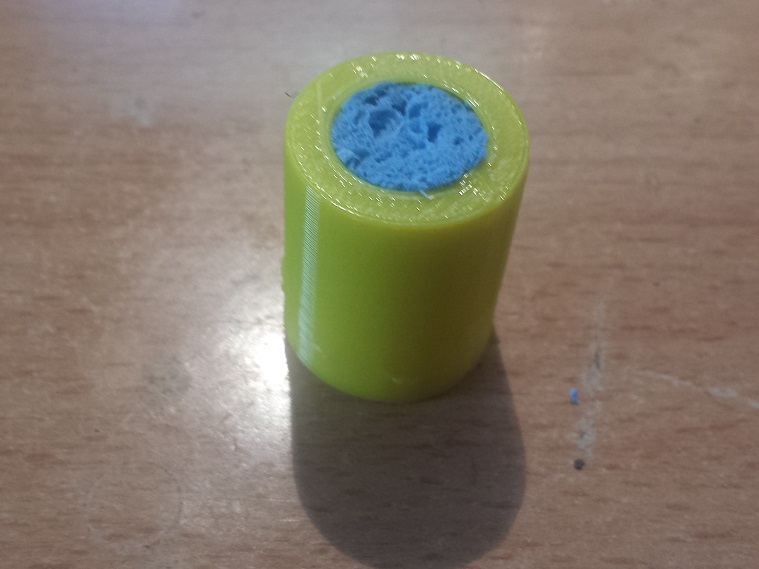
FILTER FOR FILAMENT
I have a pet dog and I noticed dog hair getting into the filament tube. The solution is to make a simple filter. This helps prolong the life of the extruder as well by preventing dust from getting into the extruder nozzle.
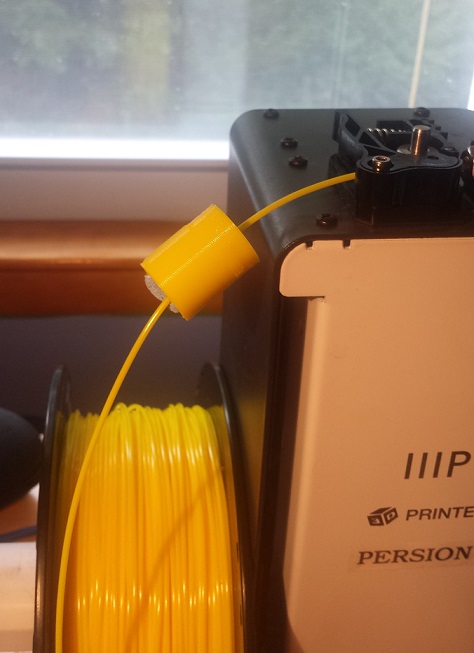
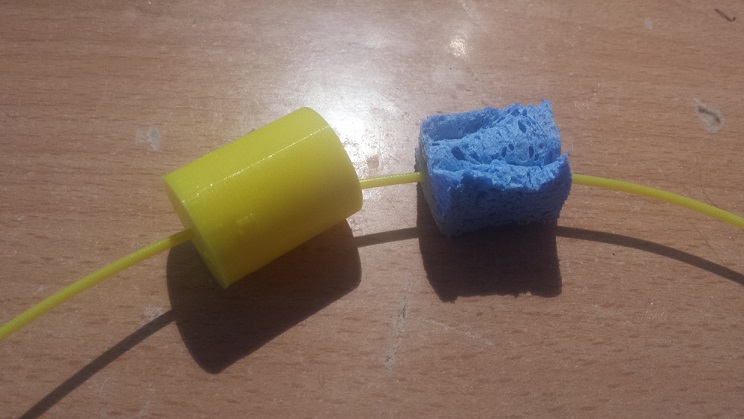
STL File
REPLACEMENT PARTS
NOZZLES (0.4mm / 1.75mm / M6)
BUILD PLATE AND EXTRUDER THERMISTORS (100k / BETA:3950)
HEATER CARTRIDGE (12VDC / 30 WATT)
REPLACEMENT PARTS
FREE 3D MODELS
http://www.thingiverse.com/